Last updated: August 16, 2026
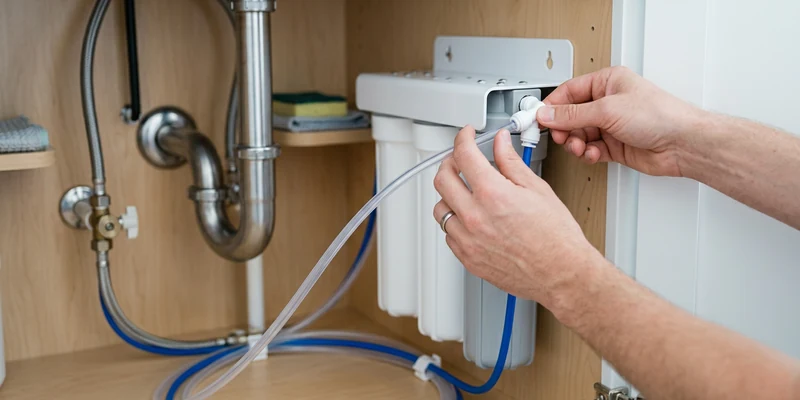
Learning how to install a reverse osmosis system under the kitchen sink stops most people before they start, mostly because the tubing, tank, and extra faucet look more complicated than they actually are. Most under-sink kits are designed for a standard cabinet install without cutting into existing supply lines beyond a couple of connection points.
This guide walks through what a typical under sink reverse osmosis installation involves, from the connections you will make to the drain line question that trips up a lot of first-time installs. It is a general overview, not a substitute for your specific system’s manual, since tank size, tubing diameter, and faucet style vary between manufacturers.
Quick Answer
What does installing an under-sink reverse osmosis system involve?
- Tapping the cold water supply line, running a drain saddle to the sink drain pipe, and mounting a dedicated faucet through the countertop or sink deck.
- Connecting the storage tank and filter stages with the tubing included in the kit, following the manufacturer’s specific stage order.
- Checking every connection for leaks before leaving the system running unattended, and flushing the system per the manufacturer’s start-up instructions.
Reverse Osmosis Installation Steps at a Glance
Every kit differs in tubing size and stage count, so treat this as a general roadmap and follow your specific manufacturer’s manual for exact steps and torque guidance.
| Step | What it involves | Common mistake |
|---|---|---|
| Tap the cold water line | Install the included feed water adapter or valve on the cold supply under the sink | Cross-threading the adapter, causing a slow leak |
| Install the drain saddle | Clamp the drain line fitting onto the sink drain pipe, typically above the trap | Placing it too close to the trap or garbage disposal connection |
| Mount the faucet | Drill or use an existing hole in the countertop or sink deck for the dedicated RO faucet | Choosing a spot too close to the existing faucet for handle clearance |
| Connect the tank | Attach the storage tank to the system using the tubing and fitting provided | Forgetting to check the tank’s factory air pressure before first use |
| Assemble filter stages | Install cartridges and the membrane in the order specified by the manufacturer | Installing stages out of sequence, which affects performance |
| Flush and test | Run the system per start-up instructions and check every fitting for leaks | Skipping the initial flush cycle the manufacturer recommends |
Before installing anything, confirm what is actually in your water. Our well water testing guide covers what to test for so the system you install is matched to your actual water quality.
Tapping the Water Supply and Drain
Reverse osmosis installation starts with two plumbing connections: a feed line off the cold water supply and a drain line for the wastewater the system produces. Most kits include a saddle valve or adapter for the supply side, and a small drain saddle that clamps onto the sink drain pipe, typically positioned above the trap so it does not get exposed to standing water.
Placement of the drain saddle matters more than it looks. Positioning it too close to a garbage disposal or the trap itself can lead to backflow issues over time, so following the manufacturer’s recommended placement distance from those fixtures is worth the extra few minutes it takes to get right.

Choosing a Faucet Location and Mounting the Tank
Most under-sink reverse osmosis systems include a dedicated faucet, separate from your regular kitchen faucet, that delivers filtered water only. Mounting it usually means drilling a new hole in the countertop or sink deck, or reusing an existing hole such as a spot left by a discontinued sprayer, and leaving enough clearance from the main faucet handle for comfortable use.
The storage tank needs enough cabinet space to sit upright and be accessible for future service, and most manufacturers specify a factory air pressure that should be checked before the tank is put into service for the first time. Confirm your specific tank’s pre-charge pressure against the manufacturer’s instructions rather than assuming a default number.
Understanding the Drain Line and Wastewater
Reverse osmosis systems send some water down the drain as part of the filtration process, and the ratio of wasted water to treated water varies significantly by system design. According to EPA WaterSense program data, older conventional point-of-use RO systems commonly send five or more gallons of water down the drain for every gallon of treated water produced, with some models running considerably higher.
Newer systems designed for efficiency perform much better. To earn the EPA WaterSense label, a point-of-use RO system must send no more than 2.3 gallons down the drain for every gallon of treated water it produces, and WaterSense estimates choosing a labeled model saves more than 3,100 gallons of water per year compared to a typical unlabeled system. If minimizing wastewater matters for your household, checking whether a system carries the WaterSense label, or asking the manufacturer directly for its rated ratio, is worth doing before you install.

After Installation: Membrane and Water Quality
Once the system is installed and flushed, the reverse osmosis membrane inside it is the component that does the heaviest work and eventually needs replacing on its own schedule, separate from the pre-filter and post-filter cartridges. Our RO membrane replacement guide covers what to expect there.
It is also worth labeling each tubing connection or taking a quick photo of the assembled system before you close up the cabinet. Reverse osmosis installation involves several similarly sized tubing lines, and having a reference point makes future filter changes or troubleshooting considerably faster than trying to remember the original layout from memory months later.
Reverse osmosis also strips out naturally occurring minerals along with contaminants, which some households choose to address with a remineralization stage after installation. Our remineralization guide covers how that stage works and how it differs from a simple alkaline filter.
Common Mistakes to Avoid
- Skipping the water test beforehand. Installing a system without knowing your actual water quality means guessing at whether RO is even the right fix.
- Placing the drain saddle too close to the trap or disposal. Follow the manufacturer’s recommended distance to avoid backflow issues.
- Forgetting to check the tank’s air pre-charge. An incorrectly pressurized tank affects how much water it actually stores.
- Skipping the initial flush cycle. New membranes and cartridges typically need a startup flush before the water is used normally.
- Not checking every fitting for leaks after installation. A slow drip under the sink can go unnoticed for weeks without a check.
Frequently Asked Questions
Can I install a reverse osmosis system myself? Many under-sink kits are designed for a standard DIY install with basic tools, following the manufacturer’s manual. If you are not comfortable with the water line and drain connections, a licensed plumber can complete the installation instead.
Do I need a dedicated faucet for reverse osmosis water? Most under-sink systems include one, since RO water is typically delivered separately from your regular tap rather than mixed back into the household cold line.
How much water does a reverse osmosis system waste during installation and use? It depends on the specific system. EPA WaterSense data shows older conventional systems commonly send five or more gallons down the drain per gallon of treated water, while WaterSense-labeled systems are capped at 2.3 gallons or less per gallon produced.
Where should the drain saddle be installed? Typically on the sink’s drain pipe above the trap, following the manufacturer’s specified distance from the trap and any garbage disposal connection to avoid backflow issues.
Does reverse osmosis installation require cutting into the main water line? No, most under-sink systems tap into the cold water supply line under the sink using an included adapter or saddle valve, without cutting into the home’s main plumbing.
How long does a typical reverse osmosis installation take? It varies by kit and cabinet layout, but most manufacturers design under-sink systems to be installed in a single session by following the included manual step by step.
The Bottom Line
Installing an under-sink reverse osmosis system comes down to a handful of connections: the cold water supply, a drain saddle above the trap, a dedicated faucet, and the storage tank and filter stages themselves. The wastewater ratio varies widely between systems, with WaterSense-labeled models capped at 2.3 gallons down the drain per gallon produced compared to five or more for many older systems. Test your water first, follow your specific manufacturer’s manual for exact steps, and check every connection for leaks before considering the installation finished.